Before any real photographic examples of histogram use, I must add few more facts regarding images and histograms as they are used today in the digital cameras or post processing software.
Colored Images and Their Representation
Most of the photos we shoot with a digital camera are color images. Even when they are presented as black and white photos, they were probably taken with a color camera then converted to black and white (or grayscale) in the post-processing phase.
As I mentioned in the “Light and Colors – Part 3” post, the color perception in the human eye relies on the receptors that exhibit sensitivity to approximately red (R), green (G), and blue (B) colors – also called fundamental colors – all the other colors in the visible spectrum are produced as a combination of these three fundamental colors.
The vast majority of photo sensors are built to mimic the same behavior with photo cells that are sensitive to the same colors (RGB sensors). The same principle applies to devices used to reproduce colored images (monitors, color printers) that also use three fundamental colors to generate any other color in the spectrum.
As consequence, the image files we manipulate in digital photography comply with standardized formats where each color is represented as a number. In colored image formats each pixel is represented as a triplet of numbers (R, G, B) describing the combination of fundamental colors producing a certain color from the spectrum. As I mentioned in the previous post, the numbers are integers usually in the 0 to 255 range (for the most common formats used today like JPEG or PNG). Other formats that use different representation exist – I will mention these formats later or when necessary.
Examples of different colors using the (R, G, B) representation:
- White: (255, 255, 255)
- Red: (255, 0, 0)
- Green: (0, 255, 0)
- Blue: (0, 0, 255)
- Black: (0, 0, 0)
- Yellow: (255, 255, 0)
- Cyan: (0, 255, 255)
- Magenta: (255, 0, 255)
- Orange: (255, 128, 0)
- Purple: (128, 0, 128)
- . . . . .
If you magnify an image enough, the colored pixels will appear like squares as in the following picture:
![]()
Each pixel value is represented by (R,G,B) triplets as below (from the top-left corner):
(199,167,118); (221,181,120); (169,139,79); (144,114,64); … etc.
There are other ways of representing pixels; for example, using (Hue, Saturation, Luminance) triplets. In most cases, there is a mathematical transformation between different representations which makes them equivalent.
The Histogram of a Colored Image
If the histogram of a black and white image was easy to understand (see my previous post), the histogram of a colored image is a bit more complex in the sense that we will probably look at each fundamental color separately. The result is a tri-color histogram – or simply a color histogram – in fact three different histograms (one for red, one for green and one for blue) represented on the same graph.
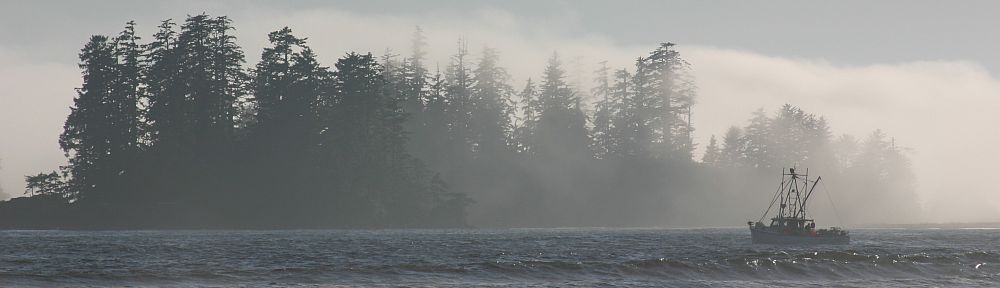
The following picture:

produces the following tri-color histogram:

where each curve corresponds to one of the fundamental colors. Sometimes the curves (or partial histograms) overlap, like in the bright areas of the image; sometimes the curves have different shapes, like the blue histogram in the middle and dark areas of the image.
In practice the color histogram is used to determine the tonal range of each fundamental color, to estimate color saturation (asses if a certain color is clipped) and to reveal the color casts (the dominance of one color in relationship with the other colors). This may have an impact in correcting the color appearance of an image in post processing. However, in every day shooting the color histogram has a lesser importance especially for amateur photographers (and even less for the ordinary people).
The luminance histogram can be determined by calculating the perceived brightness of each pixel. The process is somewhat similar to transforming the image to black and white first then calculating the histogram in the same way we did it in the previous post. For example, converting the previous picture to grayscale:
")
the resulting histogram looks like this:
 -- Luminance Histogram")
As you can see, the luminance histogram shows all three components (R, G and B) overlapping and producing in the end the same kind of histogram we introduced in the previous post.
The luminance histogram is provided by a large majority of modern digital cameras as a live histogram (that you can see before taking the picture on the LCD screen or in viewfinder) and as static histogram (that you can see when the picture is reviewed on the LCD screen). Cheap cameras or older models may not offer the live histogram but only the static histogram – this means you may need to review the image taken, analyze it looking at its histogram, apply some corrections (if needed) and take another shot.
High end cameras (including most of the DSLRs and alike) not only provide the luminance histogram but also the color histograms helping you to assess whether or not individual colors have been clipped.
In the next post we will bring examples of photos with their histograms and we will try to interpret them. It sounds like fun after all this dull semi-scientific introduction in histograms. In the mean time, take your camera and evaluate its ability to produce histograms – live or not. The best thing is to read the manual and to activate the histogram then go out and take some pictures. Don’t try to analyze and interpret the histograms yet: just grab some images in different lighting conditions, on a sunny day or on a cloudy day, in the fog or in the clear, and look at the histograms.
Have fun!