The HDR introduction I wrote around Christmas time was enough to explain the reasons why you should look for a camera that has certain capabilities. As I mentioned, some provide the HDR functionality in the camera without the need of a separate post-processing step requiring a computer and a special software. But hey! Where is the fun? Indeed, the HDR offers more artistic possibilities in post-processing if you have the right tools.
Let’s start with the equipment and tools that you will need to shoot HDR:
- A camera that allows exposure bracketing and provides some level of manual control like aperture priority. Manual focus would be nice too.
- Any form of remote control (wired or wireless) or a simple timer function provided by the camera is highly recommended.
- A stable tripod to put the camera on. If not a tripod, at least some kind of support like the pod (tripod alternative) or Joby’s GorillaPod.
- A nice static scene or landscape with relatively high contrasts. Or let your imagination be your guide. But don’t forget the keyword static; avoid any movement into your scene for as long as you take the 3 to 5 shots required for a good quality photographic material to use in the HDR process. In time you will learn how to deal with motion in HDR but for the start go completely motionless.
- A decent computer with enough memory and speed for running the HDR software. These two attributes are the most important in making your choices (if you don’t own a computer yet). I would recommend a computer with a quad core CPU running at 2 GHz or higher and at least 4 GB of RAM (8 GB would be much better).
- There are several software tools for manipulating HDR material. Their price starts with free (like in free beer) and ends at few hundred dollars. If your camera came with an HDR capable software, start with it first and see how it goes. If not, try Picturenaut (free) – it is relatively simple for beginners but the results may disappoint a little bit if want to go beyond the simple dynamic compression of the image. Finally, with around $100, you can get one of the best HDR tools available – Photomatix.
- Time, patience and willingness to experiment.
I’m not going to provide details regarding the HDR process in this post. But I will include here an example. Bear with me: I’m learning HDR too!
I used a Canon EOS 7D camera with EF-S 10-22 mm f/3.5-4.5 USM zoom lens mounted on a Manfrotto 190XB tripod and controlled by a wired remote switch RS-80N3. While this is considered by many as expensive photo equipment, I could have used my little compact Canon SX260 HS and a much cheaper tripod with similar results. One problem for SX260 HS would have been the exposure bracketing that Canon decided not to include with this, otherwise nice, little camera. Thanks to the folks at CHDK most Canon compacts (including SX260 HS) can be extended with extra features including exposure bracketing. But this is another story…
The scene is irrelevant in this experiment. What matters here is the result.
The shooting: with the camera mounted on the tripod I framed the scene and waited for the wind to calm down (remember, the scene must be static as much as possible). The camera was set on aperture priority in order to make sure that the depth of field remains the same for all the individual shots. The focus was set to manual and left alone after I made sure that the image was sharp (you can focus first on automatic and switch to manual carefully after). The exposure bracketing has been set to 3 shots at ±1 1/3 EV intervals (±1 EV works fine too if your camera cannot do more). The shutting mode was set to continuous high speed (8 frames per second); the reason for selecting the highest speed the camera can achieve in a burst is to ensure that the eventual movement of the leaves and branches in this scene is minimal (the image is quasi-static).

The developing: I kept the three images obtained after shooting intact. No exposure correction (!!!), no cropping, no sharpening, etc. You get the idea: never touch your HDR material even if you feel the urge to do it.
The HDR processing: I used two programs for comparison.
One is Canon DPP (Digital Photography Professional) that came with my camera – this programs is meant primarily to convert picture formats, make adjustments/corrections and organize your photo library. In addition, the latest update of DPP from Canon contains a simple HDR tool that combines three shots in a single LDR picture using a proprietary blending algorithm. Tone mapping is also possible. It is easy to learn and to experiment with this tool, especially if you are a beginner. Despite of being limited, I had some fun trying the controls and watching the results – a good way to learn. Here is one result that I decided to keep for this posting:
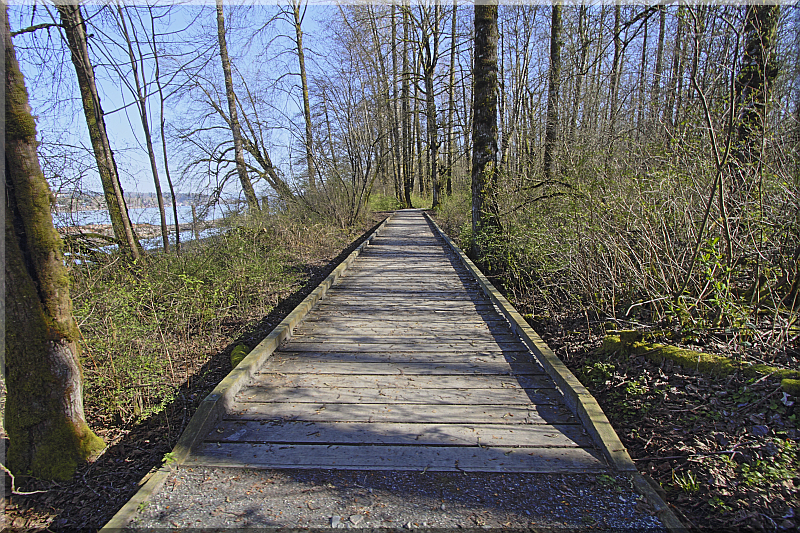 It looks better – the shadows reveal enough details. But the resulted image feels more than a simple correction.
The second program is Luminance HDR. It is not a program for the beginners and far from being friendly or intuitive. Almost everything you try with this program is a painful lesson first. I decided to experiment for few hours until I came with this:
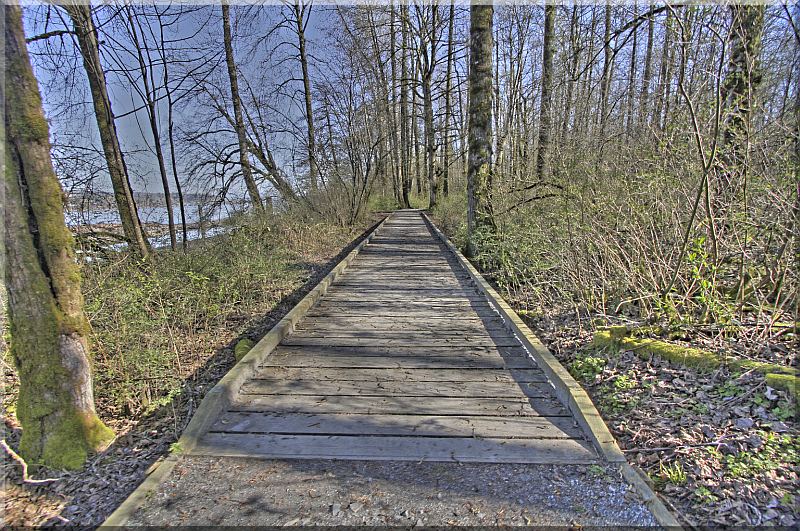 Well… this is definitely something new! And weird! Is it HDR or just a new form of art? When digital alterations become art and when they produce just Kitsch? The jury is out…
What do you think? Is the HDR process just a technical skill?
Please comment on my posting. I’d really be interested in your opinion.