Remember the simple equation that defines the exposure? The equation was introduced in the post “How Much Light Is Needed Inside the Camera?” and shows that the exposure (i.e. luminous energy) represents the product between illumination (modulated by the aperture) and exposure time. The relation is valid for a given sensitivity in the sense that the more sensitive the sensor is the less luminous energy is necessary to produce a similar result (we ignore the noise for the moment).
As consequence, aside aperture, we can use the exposure time – the time interval the sensor is exposed to light – as a second parameter to change the image resulting from the process of shooting.
In the early days of photography the photosensitive material was slow, requiring large amounts of luminous energy to produce a result. Exposure times of seconds were something normal and the subjects were asked to stay still; otherwise the image looked blurred. Once the chemical processes were improved, and the photosensitive material evolved, the exposure times were reduced substantially to fractions of second.
I remember the first cameras I ever held into my hands – it was a German box camera that had two exposure time selections: 1/25 s and manual (keep the shutter open and close it manually without the help of a timer). It also had three possible apertures: F8, F5.6 and F4. Not too much light control after all but enough to produce reasonable B/W photos on ISO 120 roll film (6 x 6 medium format). Not too long after this experience I moved to a 35 mm camera with several exposure times between 1/15 to 1/250 s. Many compact film cameras did not offer more than 1/4 to 1/500 s range for a while. 35 mm film SLRs expanded the exposure range to 10 s to 1/1000 s or more, giving the photographer the ability to “freeze” the motion while using fast lenses and high sensitivity film, essential for sports and wild life photography.
The digital era brought the wide range of exposure times into the compact camera domain; the average photographer can now use accurately controlled exposures in the 60 s to 1/2000 s without paying a price premium for this feature. The digital SLRs can push the shortest exposure time to 1/8000 s for really fast moving action (e.g. race cars).
If the photographer controls manually the exposure time, some simple rules apply:
- Handheld photography requires relatively short exposure time to avoid motion blur; without knowing the focal distance of the lens, it may be safe to assume that 1/250 s and faster will produce good results most of the time. Those with steady hands may go below 1/250: for the average camera that does not extend too much into the long focal distances, 1/60 s is probably a good bet. Experienced photographers with very good shooting technique can go sometimes as low as 1/10 s.
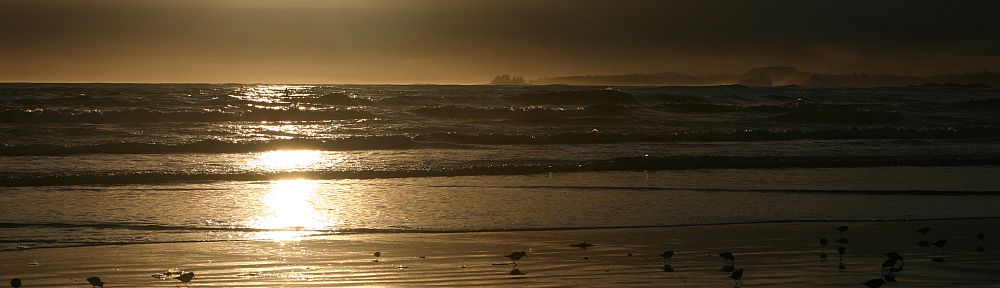
- Tripods and remote shutter control allow the usage of long exposure times (above 1/10 s). Such long times are either required in low-light photography (e.g. night photography) or for artistic effects in some situations.
- When it comes to short exposure time sports and wild life are probably the most demanding. 1/1000 s or faster is required to “freeze” the motion and to obtain a sharp image.
If you know the focal length of your lens and the geometry of the sensor, you can use the 35 mm equivalent to determine the longest exposure time you can use in handheld shooting (without image stabilization): the longest exposure time is the reciprocal of the 35 mm focal length. For example, a 50 mm focal length will correspond to 1/50 s or faster. Considering that most cameras have a typical zoom of 28…135 mm focal length (35 mm equivalent), the 1/125 s is probably the lowest exposure time at the long focal distance – this explain my rule of thumb with 1/250 s (just to play it safe).
Most modern cameras come with various image stabilization systems in order to assist handheld photography. These systems will help to achieve about 4…8 times longer exposures for the same aperture without the danger of motion blur. As consequence, the 1/250 s limit for could change to 1/30 s. This definitely helps in low-light conditions when the largest aperture of the lens is not enough to provide the amount of light required to produce a good image.
The following picture of a breaching humpback whale was taken from a bumping Zodiac boat with a shutter speed of 1/2000 s (no image stabilization).

Canon 300D with EF 55-200mm, f = 200mm, ISO 400, F8, 1/2000 s
The next capture uses a long exposure time for two reasons: one is the relatively low-light environment (the water falls was in the shadow), the other one is purely artistic – to create that “dreamy” appearance of the falls due to the motion blur created by the dropping water.
")
Canon 40D with EF-S 17-55/2.8, ISO 100, f = 17mm, F8, 1.6 s
Most of the compact cameras intended for the consumer market, provide very little control on the exposure in terms of sensitivity, aperture and time. Usually, these cameras come pre-programmed for different scene modes, the camera deciding what works best for the selected mode. Sometimes, the photographer can only adjust the overall exposure in steps using the camera light measurements as reference: you can move in increments either towards letting more light in the camera or on the opposite direction reducing the light. Many beginners ignore this feature anyways despite of proving very useful in unusual lighting situations where the camera may fail to determine an adequate exposure. This is known as exposure compensation control.
More expensive cameras, dedicated to the enthusiast amateur, have the ability to let the user control the exposure parameters manually, offering far more flexibility and encouraging the creativity of the photographer. In my postings I assumed this category of cameras – they are not only better equipped but also offer the opportunity to learn the secrets of photography by replacing the camera’s “brain” (i.e. the embedded computer) with the photographer’s brain. It is absolutely the best way to learn how a camera works and what are the ways to unleash the creativity in us.
In the next posts I will return to the exposure control many times with examples. I will introduce you to two very useful semi-automatic shooting modes: aperture priority and shutter priority. In fact, I only use full manual control in special situations. Most of the time these two modes combined with exposure compensation give me the flexibility that I need to get the results I want. Stay tuned for more!